To develop an app, you usually perform several iterations of the following activities:
- Set source code to implement new or modified feature or bug fix
- Build the solution
- Deploy a test environment containing the solution
- Run QA tests in front of the test environment to confirm if the tests pass
- Notify the development team of test failures or a successful test run
- Destroy the test environment after completing the cycle
- Wait for the following code commitment to start the cycle again
If you automate these activities, the development lifecycle becomes much more efficient. With well-built automated testing, it also becomes much more effective because you reduce manual intervention as much as possible.
Summary of steps
This example shows you how to leverage Acunetix integration with GitHub – it runs a full test cycle whenever there is a pull request. In this cycle, you perform the following steps:
- Log in to your Docker host:
- Create a folder to hold files for building a container container with the web app
- Copy relevant files to build a container container on Docker’s host
- Build a picture of the staging container and run its show
- Check that the web app in the stage show responds to requests with 200 OK
- Run a script to move Acunetix to:
- Create the deployment target
- Run an intermediate destination scan
- Wait for the scan to complete
- Check the number of vulnerabilities found; If at least 1 is found, the process will be considered approx Fails
- Login to host Docker:
- Stop and remove the preparation container and its basic image
- Remove the folder created for the step container files
Create a GitHub repository for your web application
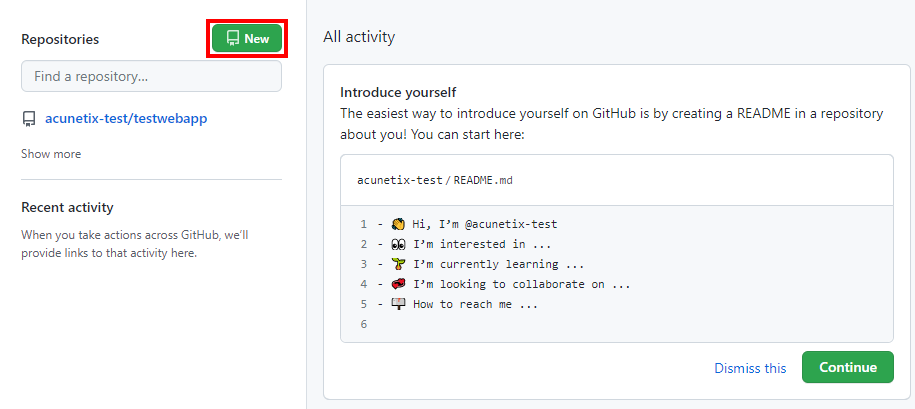
- Log in to your GitHub account
- Click on the New Button for creating a new database
- Enter the information for your new database:
- Set your database name to test-php-site
- Set your database description to PHP site my test
- Allow the Add README file Check box to initialize your source code repository
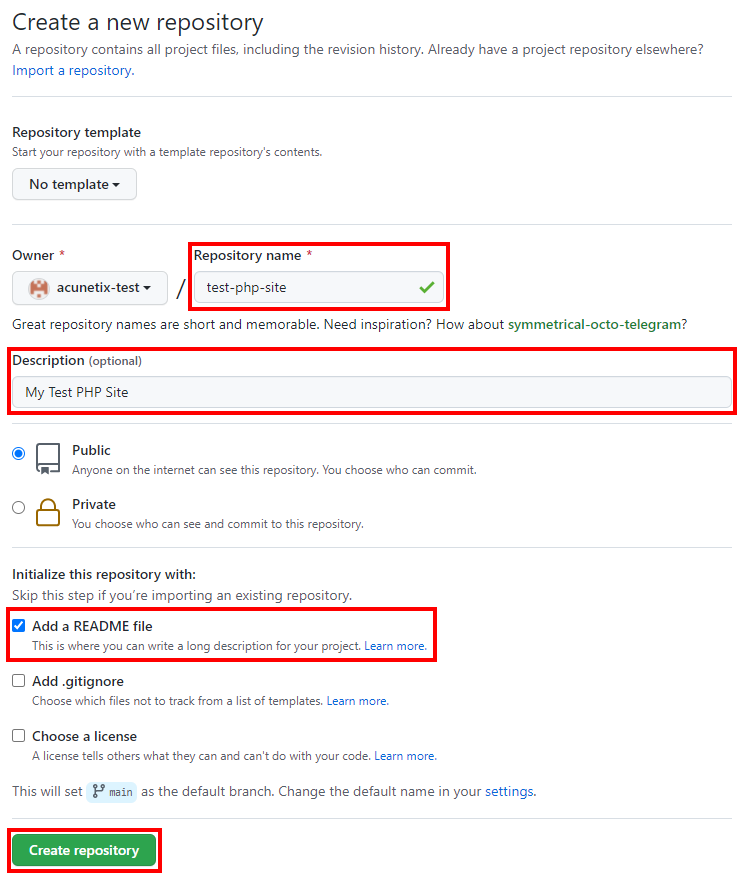
- Click on the Create a repository button
Create a repository folder with your web application and its associated Docker file
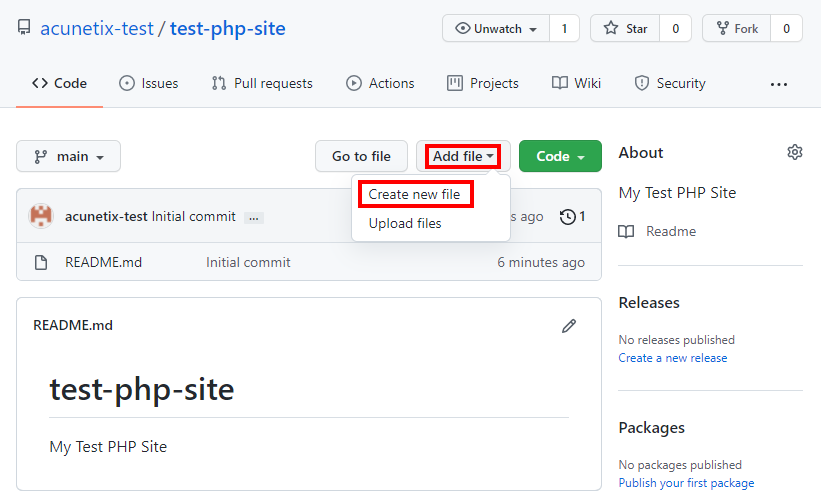
- On your Repository page, click Add file Button and select the Create a new file Option from the drop-down menu
- Create the product / index.php File as follows:
-
- Set the file name to product / index.php
- Set the content to:
<html>
 <head>
  <title>PHP Test</title>
 </head>
 <body>
 <?php echo '<p>Hello World</p>'; ?>
 </body>
</html>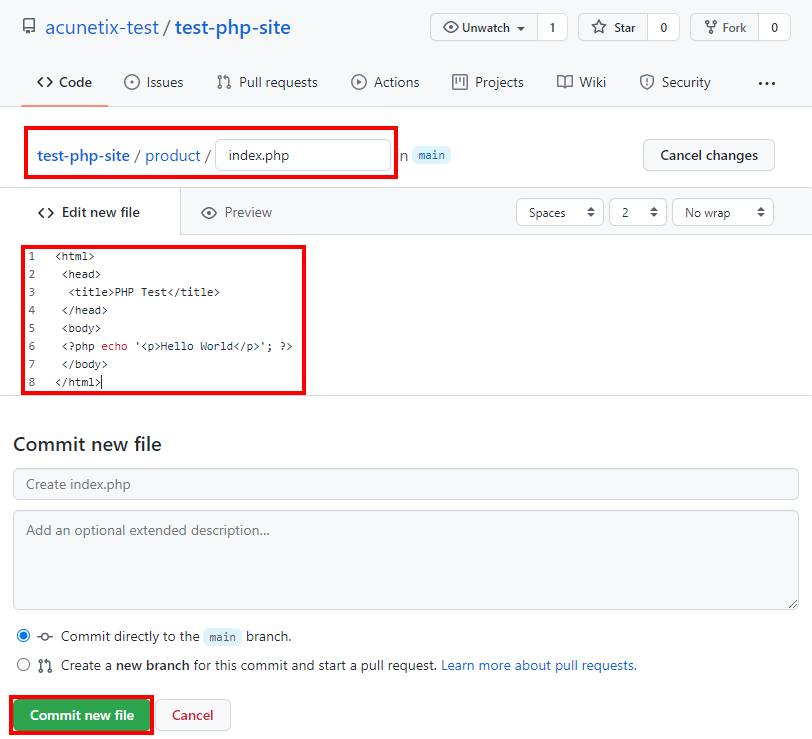
-
- Click on the Set up a new file button
- On your Repository page, click Add file Button and select the Create a new file Option from the drop-down menu
- Create the Product / Dockerfile File as follows:
-
- Set the file name to Product / Dockerfile
- Set the content to:
FROM php:7.3.28-apache
#setup the web pages
COPY --chown=www-data:www-data index.php /var/www/html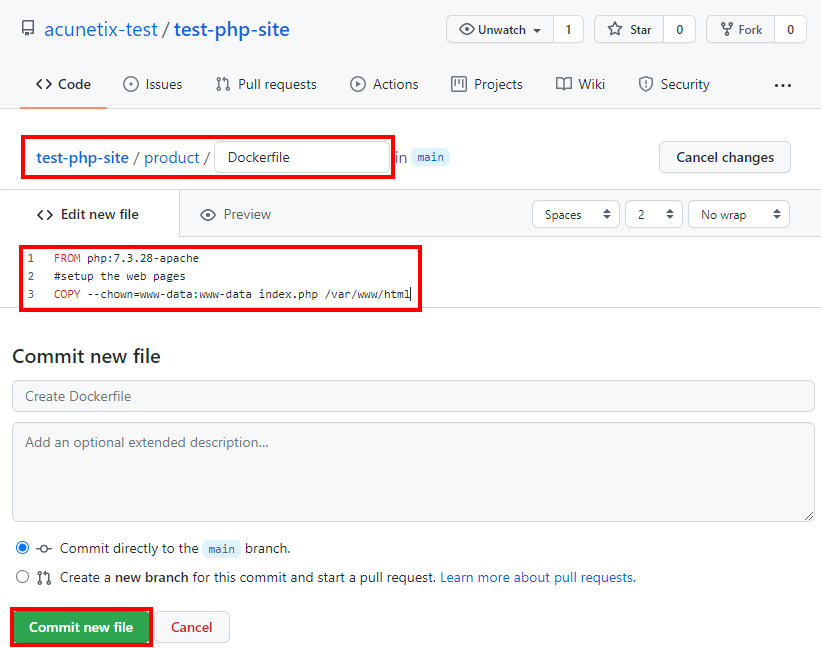
-
- Click on the Set up a new file button
Create a repository folder that contains your Acunetix scan script
- On your Repository page, click Add file Button and select the Create a new file Option from the drop-down menu
- Create the scripts / axscript.sh File as follows:
-
- Set the file name to scripts / axscript.sh
- Set the content to:
#!/bin/bash

# Declare functions
cleanup(){
# Delete the scan
Dummy=`curl -sS -k -X DELETE "$MyAXURL/scans/{$MyScanID}" -H "Accept: application/json" -H "X-Auth: $MyAPIKEY"`
# Delete the target
Dummy=`curl -sS -k -X DELETE "$MyAXURL/targets/{$MyTargetID}" -H "Accept: application/json" -H "X-Auth: $MyAPIKEY"`
}

# Create our intended target
MyTargetID=`curl -sS -k -X POST $MyAXURL/targets -H "Content-Type: application/json" -H "X-Auth: $MyAPIKEY" --data "{"address":"$MyTargetURL","description":"$MyTargetDESC","type":"default","criticality":10}" | grep -Po '"target_id": *K"[^"]*"' | tr -d '"'`

# Trigger a scan of the target
MyScanID=`curl -i -sS -k -X POST $MyAXURL/scans -H "Content-Type: application/json" -H "X-Auth: $MyAPIKEY" --data "{"profile_id":"$ScanProfileID","incremental":false,"schedule":{"disable":false,"start_date":null,"time_sensitive":false},"user_authorized_to_scan":"yes","target_id":"$MyTargetID"}" | grep "Location: " | sed "s/Location: /api/v1/scans///" | sed "s/r//g" | sed -z "s/n//g"`

while true; do
 MyScanStatus=`curl -sS -k -X GET "$MyAXURL/scans/{$MyScanID}" -H "Accept: application/json" -H "X-Auth: $MyAPIKEY"`
 if [[ "$MyScanStatus" == *""status": "processing""* ]]; then
   echo "Scan Status: Processing - waiting 30 seconds"
 elif [[ "$MyScanStatus" == *""status": "scheduled""* ]]; then
   echo "Scan Status: Scheduled - waiting 30 seconds"
 elif [[ "$MyScanStatus" == *""status": "completed""* ]]; then
   echo "Scan Status: Completed"
   # Break out of loop
   break
 else
   echo "Invalid Scan Status: Aborting"
   # Clean Up and Exit script
   cleanup
   exit 1
 fi
 sleep 30
done

# Obtain the scan session ID
MyScanSessionID=`echo "$MyScanStatus" | grep -Po '"scan_session_id": *K"[^"]*"' | tr -d '"'`

# Obtain the scan result ID
MyScanResultID=`curl -sS -k -X GET "$MyAXURL/scans/{$MyScanID}/results" -H "Accept: application/json" -H "X-Auth: $MyAPIKEY" | grep -Po '"result_id": *K"[^"]*"' | tr -d '"'`

# Obtain scan vulnerabilities
MyScanVulnerabilities=`curl -sS -k -X GET "$MyAXURL/scans/{$MyScanID}/results/{$MyScanResultID}/vulnerabilities" -H "Accept: application/json" -H "X-Auth: $MyAPIKEY"`

# Count vulnerabilities
MyVulnerabilityCount=$(echo $MyScanVulnerabilities | jq '.vulnerabilities | length')

# Exit with error if we find vulnerabilities; exit WITHOUT error if vulnerabilities count is 0
if [ $MyVulnerabilityCount -gt 0 ] ; then exit 1 ; else exit 0 ; fi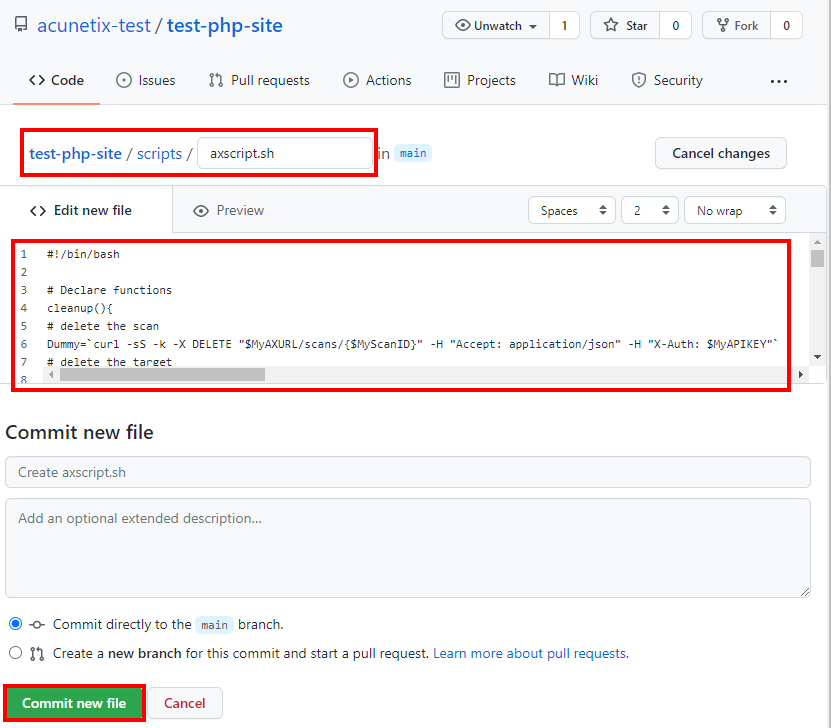
-
- Click on the Set up a new file button
Create secrets for your database
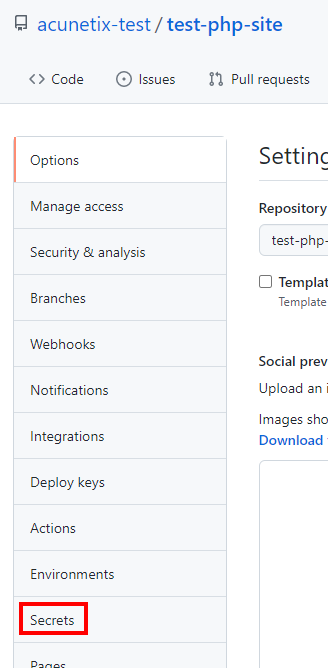
- On your Repository page, click Definitions symbol

- Click on the Secrets Option in the sidebar
- On Secrets of action Page, click New database secret button
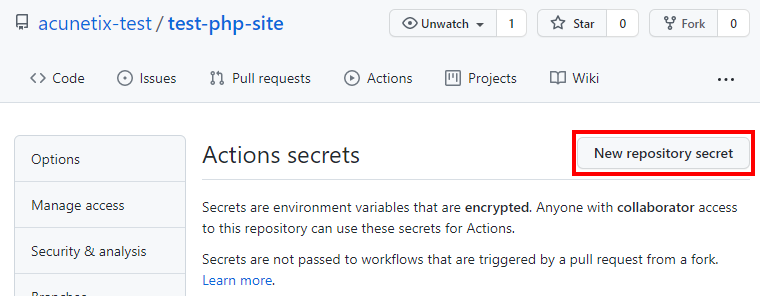
- Create 4 secrets as follows:
- DOCKER_HOST – This must contain the public IP address of your Docker host
- DOCKER_USER – This must contain the username used to connect to the Docker host using SSH
- DOCKER_KEY – This must contain the SSH key used to connect (securely but without a password) to the Docker host; It will usually start with —–Start open a private key—– And finish with —–END OPENSSH PRIVATE KEY—–
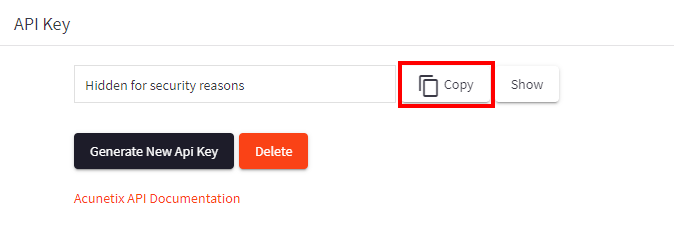
- MYAPIKEY – This must contain the API key for your Acunetix account, which you can retrieve from the Acunetix profile page:
Create your workflow file
-
- On your Repository page, click Add file Button and select the Create a new file Option from the drop-down menu
- Create the .github / workflows / main.yml File as follows:
-
- Set the file name to .github / workflows / main.yml
- Set the content to:
# main.yml
name: Vulnerability testing
on:
  push:
    branches:
      - main
env:
  MyAXURL: 'https://online.acunetix.com/api/v1'
  MyTargetURL: 'http://acunetixexample.com:8080'
  MyTargetDESC: 'Test PHP Site - created via GitHub-to-Acunetix CI/CD integration'
  ScanProfileID: '11111111-1111-1111-1111-111111111111'
jobs:
  deploy:
    name: Deploy product to the Docker host
    runs-on: ubuntu-latest
    steps:
      - name: checkout_code
        uses: actions/checkout@v2
      - name: create_docker_folder
        uses: garygrossgarten/github-action-ssh@release
        with:
          host: ${{ secrets.DOCKER_HOST }}
          username: ${{ secrets.DOCKER_USER }}
          privateKey: ${{ secrets.DOCKER_KEY}}
          command: mkdir -p ~/test-php-site
      - name: copy_files_to_docker_folder
        uses: garygrossgarten/github-action-scp@release
        with:
          host: ${{ secrets.DOCKER_HOST }}
          username: ${{ secrets.DOCKER_USER }}
          privateKey: ${{ secrets.DOCKER_KEY}}
          local: ./product
          remote: test-php-site/
      - name: build_and_run_docker_container
        uses: garygrossgarten/github-action-ssh@release
        with:
          host: ${{ secrets.DOCKER_HOST }}
          username: ${{ secrets.DOCKER_USER }}
          privateKey: ${{ secrets.DOCKER_KEY}}
          command: |
            cd ~/test-php-site
            docker build -t test-php-site .
            docker run -d -p 8080:80 --name mytest test-php-site
  check:
    if: always()
    needs: deploy
    name: Check if the deployed product is functional
    runs-on: ubuntu-latest
    steps:
      - name: check_deployment
        run: wget -qO- -T 5 $MyTargetURL >/dev/null ; if [ $? != 0 ] ; then exit 1 ; fi
  scan:
    if: always()
    needs: check
    name: Scan product with Acunetix
    runs-on: ubuntu-latest
    steps:
      - name: install_packages
        run: sudo apt-get -y install jq
      - name: checkout_code
        uses: actions/checkout@v2
      - name: scan_product
        env:
          MyAPIKEY: ${{ secrets.MyAPIKEY }}
        run: |
          chmod +x scripts/axscript.sh
          scripts/axscript.sh
  destroy:
    if: always()
    needs: scan
    name: Destroy deployment
    runs-on: ubuntu-latest
    steps:
      - name: destroy_deployment
        uses: garygrossgarten/github-action-ssh@release
        with:
          host: ${{ secrets.DOCKER_HOST }}
          username: ${{ secrets.DOCKER_USER }}
          privateKey: ${{ secrets.DOCKER_KEY}}
          command: |
            docker stop mytest
            docker rm mytest
            docker rmi test-php-site
            rm -rf ~/test-php-site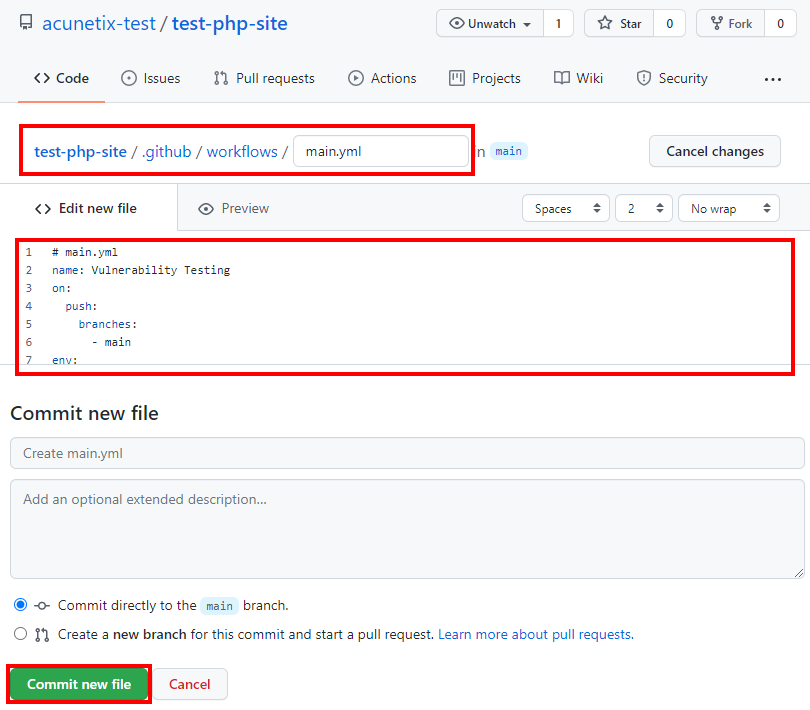
-
- Adjust the lines marked in red to reflect the details of your staging show; for example:
MyTargetURL: 'http://yourstagingdomain.com:8080' MyTargetDESC: 'Test PHP Site - created via GitHub-to-Acunetix CI/CD integration' - Click on the Set up a new file button
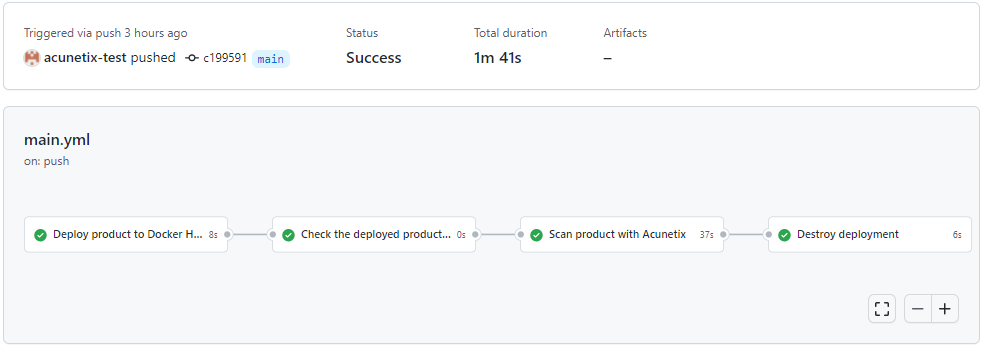
This will immediately trigger the first run of the workflow. Go to Actions Page and click on the current workflow link to view workflow progress:

When the workflow is complete, you can see the success or failure of each of the major steps in the workflow. Running with zero vulnerabilities will look like this:
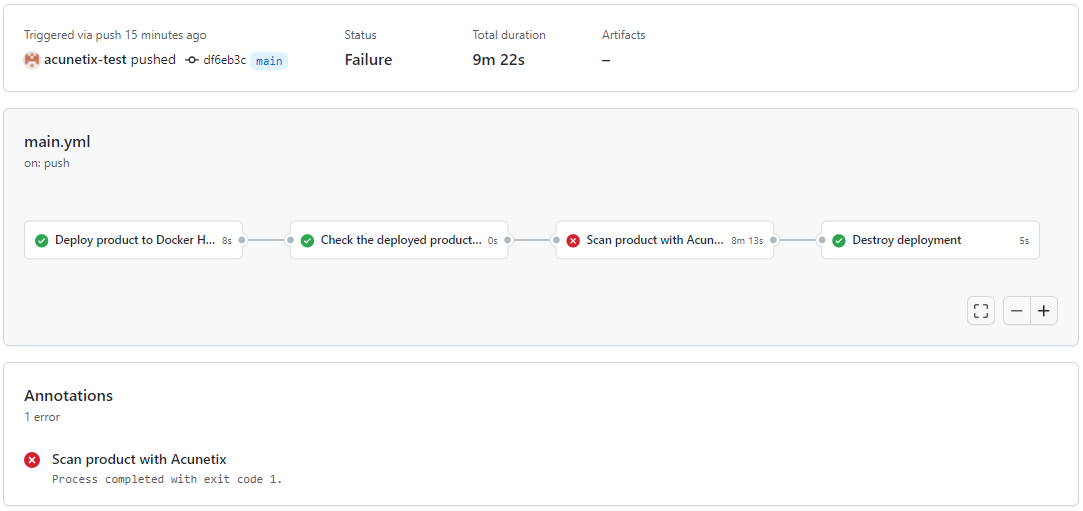
While a run that finds vulnerabilities will appear as follows:
Get the latest web security content
In your inbox every week.
The author

Technical writer
Kevin Atard Compano is a technical writer working for Acunetix. A technical writer, translator and general IT enthusiast for over 30 years, Kevin used to run technical support teams and create training documents and other material for the internal technical team.

