Originally Posted in freecodecamp.org By. Replicated here for documentation.
If you are building an Android app, you might want to consider adding animations. They can enhance the user experience of your app and increase retention.
Nowadays, if you see an app that has no animation, it can feel weird and outdated. And because interactive experiences are kind of the new norm, you’ll want to find ways to differentiate your app.
What was built here
Now, it might seem hard to make your app stand out if you only have something as basic as a bidding sharing app (which we’re going to work on here). It can be difficult to connect with the user and leave them interested.
Of course, you can just add two simple buttons to load the next / previous quote and call it a day. But it’s pretty basic and any app can do it! Even if you are just building a simple side project, there are no compromises to a good UX 🙂
So what is done in this guide is to release the buttons, and instead it makes sense where a user can slide the card to the left. When they have slipped enough, the app will load a new card with a new quote.
At the end of this post you will learn how to create a really smooth animated card that a user can slide that he can perform any action you choose. Here’s a demo of how it works:
Amazing, right? Let’s get into this!
Prerequisites
For this guide, we will use Kotlin as the programming language of our app – but you can easily translate the code into Java and it will work the same.
For reference, this is the quote card we want to enable the skating feature.

It’s Android X CardView With a bunch of TextViews and an ImageView. There are also a ProgressBar Displayed while loading a new quote.
We will not create the XML code for the user interface. You can get the layout I used here from the GitHub repository, or build your own.
Here is the full code For our quotes app, if you want to check it out. It uses the design pattern of MVVM, but this article does not rely on the template you use for the business logic of your application, since we will only work on the part of the user interface.
Now, we are ready to create this amazing skating interface!
How to handle slips in our app
To handle slips, we must first set up a touch listener on the card. Each time an action is performed on the card, it is called the touch listener. Inside the listener, we will add the logic to do the math and perform the animations.
Here is the program of the touch listener we will use:
quoteCard.setOnTouchListener(
    View.OnTouchListener { view, event ->
        when (event.action) {
            MotionEvent.ACTION_MOVE -> {

            }
            MotionEvent.ACTION_UP -> {

            }
        }


        view.performClick()
        return@OnTouchListener true
    }
)
Here, we pay special attention to 2 actions in the card – e ACTION_MOVE And ACTION_UP.
- God
ACTION_MOVEThe event is called when a user starts sliding the card, that is, moving it. - God
ACTION_UPIs called when a user lifts his finger off the card, in fact, when he releases it.
There are many other action events that we can get around, such as ACTION_DOWN This is called when a person achieves the landscape, but we do not need them for this feature.
The basic definition of the card is over, so let’s understand the logic in skating.
The math behind skating
First, let’s rethink what we want to achieve. Applying functionality is easier when you know exactly what you want to get. Your code will make more sense when your requirements are clear.
Here, we have a quote card. We want users to be able to slide it only to the left, and if the minimum threshold for loading a new bid is reached, it should return to its original location and load a new bid.
Now, to achieve this, let’s think about it in terms of the card. Let us define the average position as the center of the card.
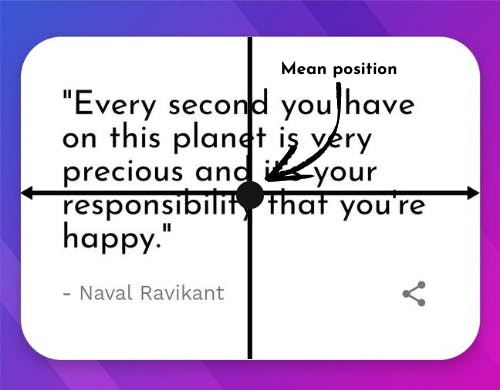
We want the card to slip if and only if the user slides it to the left of the average position.
So how can we make this happen?
You guessed it – consider the average position and the ACTION_MOVE Event, we will check if the user swipe left and move the card accordingly.
How to apply skating logic
To apply the logic, we need to first get the starting position of the card, which is quite easy to calculate. We’ll just make sure it’s calculated relative to the full screen width, not just the width of the card.
Place these lines of code before the when(event.action) Disclaimer:
quoteCard.setOnTouchListener(
    View.OnTouchListener { view, event ->


        val displayMetrics = resources.displayMetrics
        val cardWidth = quoteCard.width
        val cardStart = (displayMetrics.widthPixels.toFloat() / 2) - (cardWidth / 2)

        when (event.action) {
            ...
        }
        ...
    }
)
First we get the displayMetrics M resources, Which will give us the screen width using displayMetrics.widthPixels.toFloat().
Then we will get the cardWidth Uses b width Property of quoteCard.
Finally, we calculate the starting position of the card using the formula (width of screen/2) - (cardWidth/2). Essentially, this gives us the x coordinate of this position of the card:
Now, let’s apply the code for ACTION_MOVE case.
How to treat b ACTION_MOVE case
In the ACTION_MOVE Block, we initialize the newX A variable that holds the new x-coordinate to which the card has been replaced.
val newX = event.rawX
event.rawX Gives us the absolute value of the new coordinate relative to the width of the screen.
newX Will contain the x-coordinate where the user’s finger is, at any given moment. Value 0.0 To newX Means the user slides to the far left of the screen. And to my emulator, 1080.0 Represents the far right edge of the screen.
Since then, we want the card to clear only if newX Smaller than the average location of the card, we’ll place a condition here to make sure that’s the case.
Think of it with simple values. Suppose the average position of the card is in the x coordinate 540.0 (Small x coordinate) and the user slides to 710.0 (Larger x coordinate). But we do not want them to be able to slip to the right. And if the user slides to 320.0 (Smaller x coordinate), then we have to make the slip and move the card to the new location.
The following is the code to apply the above logic:
if (newX - cardWidth < cardStart) {
    quoteCard.animate().x(
        min(cardStart, newX - (cardWidth / 2))
    )
    .setDuration(0)
    .start()
}
We reduce cardWidth M newX Because newX Is an absolute value that is not relative to the card. It has a higher value because cardStart Is towards the beginning of the screen, and newX Is initially somewhere in the middle (usually uses a skater from the middle).
We want to compare the sliding value in the x coordinate and the median to the value of cardStart, Not the value of newX, So we take this into account by subtraction cardWidth.
Next, we perform the animation using quoteCard.animate() And we change its x-coordinate using the x() function.
Now, why do we do that min(cardStart, newX - (cardWidth/2))?
It is very interesting and intuitive to understand. From the outset we emphasize that the card should only move left and not right.
newX - (cardWidth/2)) Is nothing but the distance hovered to the left (so this is a subtraction – for the right side, it should be added).
God min() The function here returns the minimum of the two values provided. If the skating distance is less than cardStart, Is returned, otherwise cardStart Used. This is the condition we want to meet and min() Makes it really easy to handle.
setDuration(0) Ensures that the animation is performed immediately (which continues to slide without feeling lagging). start() Actually starts the animation with the given properties.
This animation will clear any doubts you have about how it works:
(I have no expertise in creating animations, it was the best I could come up with.)
Here is the final code for ACTION_MOVE case:
MotionEvent.ACTION_MOVE -> {

    val newX = event.rawX


    if (newX - cardWidth < cardStart) {
        quoteCard.animate()
            .x(
                min(cardStart, newX - (cardWidth / 2))
            )
        .setDuration(0)
        .start()
    }
}
You can also include a TextView To the user interface that reflects when the user needs to release the card. Place this code within the above if Also statement:
if (quoteCard.x < MIN_SWIPE_DISTANCE) textView.text = getString(R.string.releaseCard)
else textView.text = getString(R.string.infoText)
where MIN_SWIPE_DISTANCE he -250:
const val MIN_SWIPE_DISTANCE = -250
Now the ACTION_MOVE The incident is being handled properly. Let’s write the code to handle b ACTION_UP Event, that is, when the card is released.
How to treat b ACTION_UP case
For the ACTION_UP Event, we want the ticket to return to its original location, please wait 100 Milliseconds, then loaded a new bid.
The logic for animating the card is similar, but this time we will perform the duration of its animation approximately 150 The millisecond to make it look smooth.
First, create a variable currentX Which holds the current value of the x coordinate of the quotation card. We will use this variable later.
var currentX = quoteCard.x
Then, start the animation on the card. Pass the cardStart Varies to x() Function to make it return to its original position and set the duration to 150.
quoteCard.animate()
    .x(cardStart)
    .setDuration(150)
This time, we set up an animated listener. Listening is something that keeps an eye on the animation. By using it, we can perform actions in various animated events such as start, end, resume and more.
.setListener(
    object : AnimatorListenerAdapter() {
        override fun onAnimationEnd(animation: Animator) {
            viewLifecycleOwner.lifecycleScope.launch(Dispatchers.Default) {
                delay(100)


                if (currentX < MIN_SWIPE_DISTANCE) {

                    viewModel.getRandomQuote()
                    currentX = 0f
                }
            }
        }
    }
)
.start()
We have set up a listener to search for the end of the animation by canceling the onAnimationEnd() function.
Once the animation is over, we launch Corotina (similar to Threads in Java but much more efficient) with a delay of 100 The millisecond. It then checks to see if the user has slipped beyond MIN_SWIPE_DISTANCE Need to upload a new quote. The variable currentX Used for comparison here.
If the user really slips the minimum distance, the corotina is delayed 100 The millisecond. Then the display model loads a new random quote from the API, and also resets the currentX Varies to 0f.
Final code for vista ACTION_UP The event looks like this:
MotionEvent.ACTION_UP -> {
    var currentX = quoteCard.x
    quoteCard.animate()
        .x(cardStart)
        .setDuration(150)
        .setListener(object : AnimatorListenerAdapter() {
            override fun onAnimationEnd(animation: Animator) {
                viewLifecycleOwner.lifecycleScope.launch(Dispatchers.Default) {
                    delay(100)


                    if (currentX < MIN_SWIPE_DISTANCE) {

                        viewModel.getRandomQuote()
                        currentX = 0f
                    }
                }
            }
        })
        .start()
    textView.text = getString(R.string.infoText)
}
Final code
This is the final code for the whole onTouchListener():
quoteCard.setOnTouchListener(
    View.OnTouchListener { v, event ->


        val displayMetrics = resources.displayMetrics
        val cardWidth = quoteCard.width
        val cardStart = (displayMetrics.widthPixels.toFloat() / 2) - (cardWidth / 2)

        when (event.action) {
            MotionEvent.ACTION_UP -> {
                var currentX = quoteCard.x
                quoteCard.animate()
                    .x(cardStart)
                    .setDuration(150)
                    .setListener(
                        object : AnimatorListenerAdapter() {
                            override fun onAnimationEnd(animation: Animator) {
                                viewLifecycleOwner.lifecycleScope.launch(Dispatchers.Default) {
                                    delay(100)


                                    if (currentX < MIN_SWIPE_DISTANCE) {

                                        viewModel.getRandomQuote()
                                        currentX = 0f
                                    }
                                }
                            }
                        }
                    )
                    .start()
                textView.text = getString(R.string.infoText)
            }
            MotionEvent.ACTION_MOVE -> {

                val newX = event.rawX


                if (newX - cardWidth < cardStart) {
                    quoteCard.animate()
                        .x(
                            min(cardStart, newX - (cardWidth / 2))
                        )
                        .setDuration(0)
                        .start()
                    if (quoteCard.x < MIN_SWIPE_DISTANCE)
                        textView.text = getString(R.string.releaseCard)
                    else textView.text = getString(R.string.infoText)
                }
            }
        }


        v.performClick()
        return@OnTouchListener true
    }
}
Mazel Tov! In this tutorial, we have implemented an animation that allows the user to slide a card containing a quote to get a new quote.
Do not forget to download the app and test it yourself. Stars and contributions on GitHub repository will be welcomed!
Summary
Now you’ve learned how to animate a card and handle it animated listeners. It helps to create a better UX that makes your app stand out.
With the knowledge you gained in this post, you can now create most of the following animations for viewing on Android:
- Programmatically create sliding animations for Android views.
Just as we did in this guide.
It’s pretty simple, just make the subtraction of the variables to add and < Signs b if Statements to > Signs. With these few changes here and there, you can turn the animations from right to left in a card view to those from left to right!
- You can also view and hide views using animations.
To do this, you need to track the starting position and end position and then animate them alpha() M 0 To 1. For example, you can browse my library Aculib To create animated accordions of frequently asked questions.
- Basic changes in animated layout can be achieved through display animations.
Thanks so much for reading so far, I hope this post has added some value. Subscribe to my newsletter (at the top of the article) to stay up to date on the latest Android content!
Let’s connect

